Emojisplosion, from funwithstuff, is a collection of emoji-based particle effects for Final Cut Pro, available now from FxFactory.
Emojisplosion was created by Iain Anderson, the creator of Annotator and PiP Kit, author of Final Cut Pro Efficient Editing and an Apple Certified Trainer.
funwithstuff Emojisplosion is the easiest way to add hundreds of emoji-based particles to your videos. You can make them sit behind a title, enhance a background or make a magic wand sparkle.
Emojisplosion gives you all the flexibility you need, without the complexity of a full particle system. It’s perfect for educational, social media and sports videos, and ready for portrait or landscape videos. Most of the particles here are packaged as titles, but emoji-based transitions are included too.
Grab the free trial now and follow along with the short or long tutorials!

Quick Tutorial
First, pick the style you’re looking for — an explosive burst, a firehose spewing tennis balls at high speed, a full screen sparkling background, a shape around a person in your video, or even a giant word.

Second, pick from one of the built-in emoji characters, use the system emoji picker or type anything else in any font.
Third, use the on-screen controls to position and size the effect, and then use the streamlined inspector controls to get the effect you’re looking for. Make the emojis spin more, change their speed, their colors, and how long they last.

Detailed Tutorial
This tutorial is also available as a video, right here!
First, you’ll want to load up Titles, then find funwithstuff Emojisplosion. Drag the template you want to try out into a timeline — landscape or portrait are fine.
Each of the templates is a bit different, and they’re all sorted into categories.
Whichever one you pick, you can use the on-screen controls to change position and other properties. Dragging the circle changes scale, but on some templates this is the scale of the particles, and on others it’s the scale of the shape — whatever makes the most sense. The angle line usually changes speed, but on some templates, like Rainfall, it changes angle.
No matter what, you can always find all the controls in the Inspector — so let’s have a look through them.
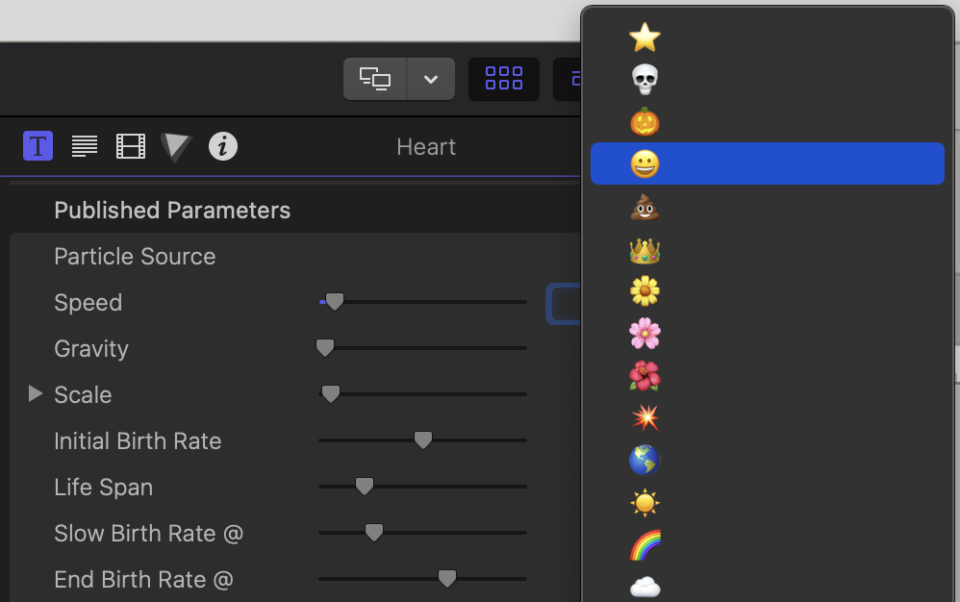
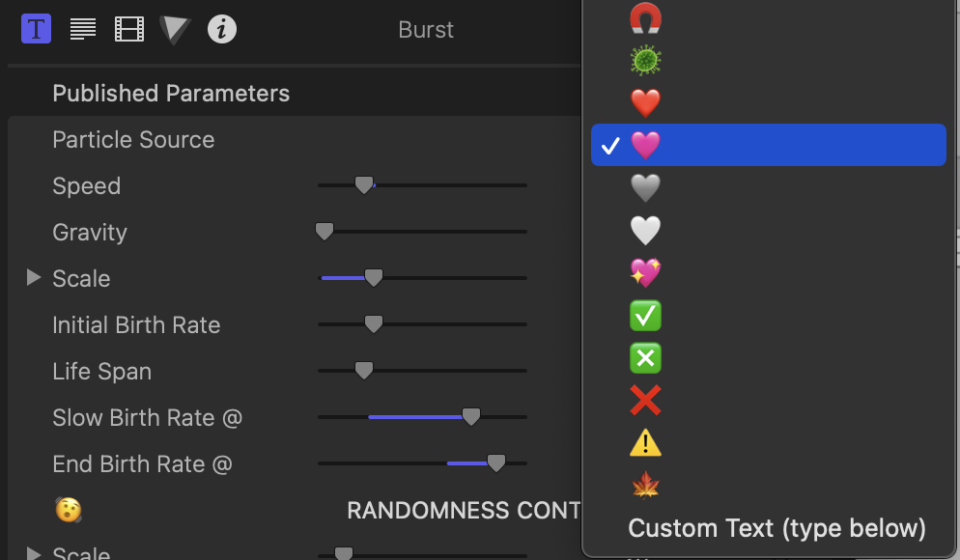
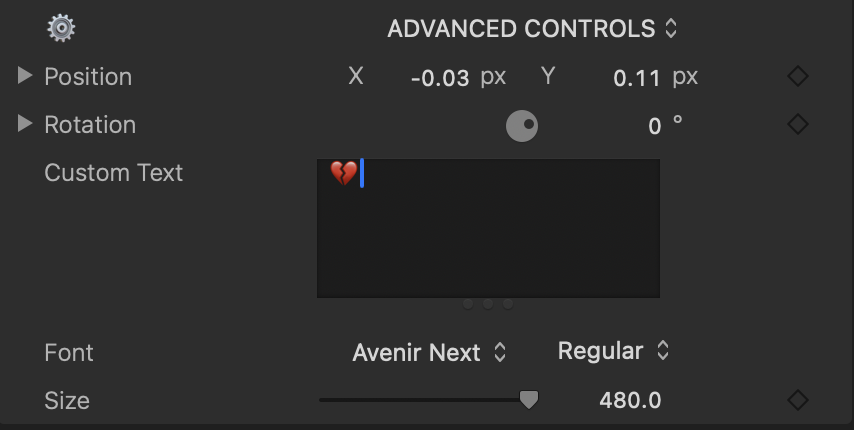
The first one is the most important: Particle Source. There’s a big list of common Emojis to choose from, and you can use any of them in any template. If you want to use something else, choose “Custom Text”. Every template comes preset with a useful alternative emoji that’s not on the regular menu, but you can type in whatever emoji you want in the Custom Text field at the bottom of the Inspector.
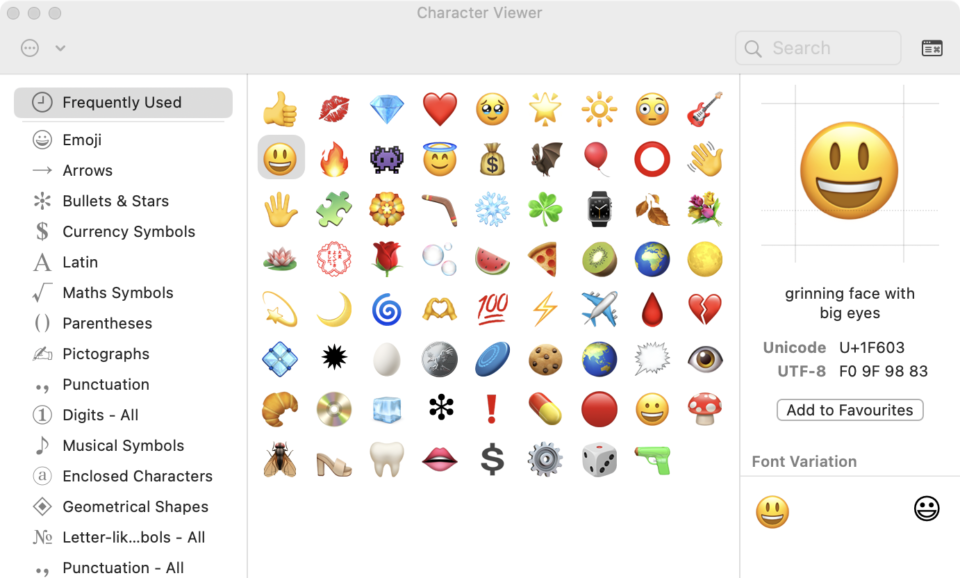
Use Edit > Emoji & Symbols or type ⌃⌘space to bring up the Emoji picker, then double-click an emoji to type it in. (Sometimes the same character will be added twice; if this happens, just delete the second one.)
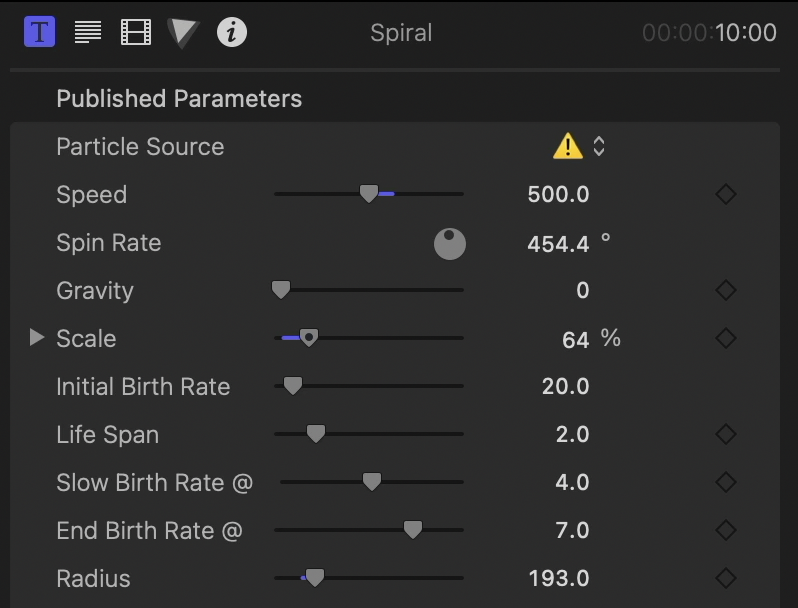
Back at the top, drag directly on the numbers to change the parameters. Hold ⇧ (Shift) to go fast, ⌥ (Option) to go slow.
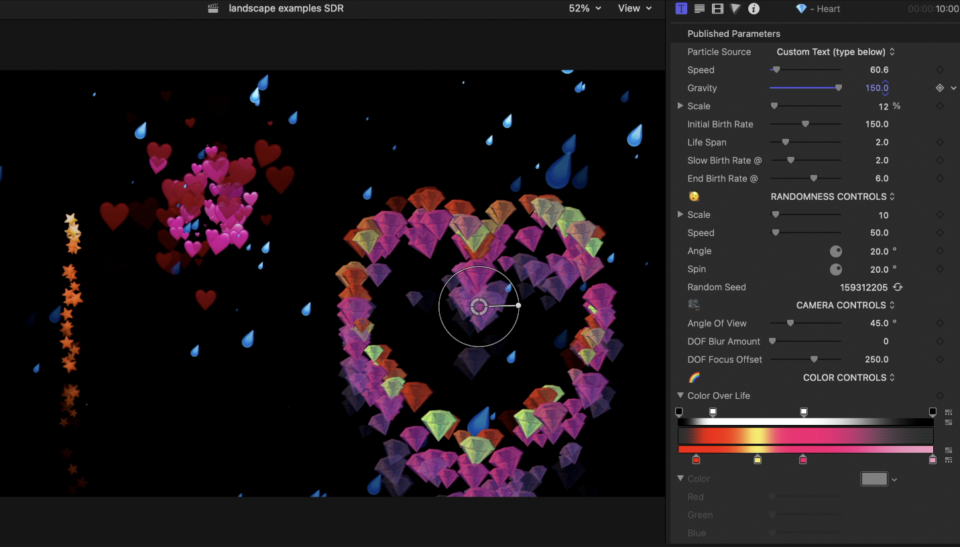
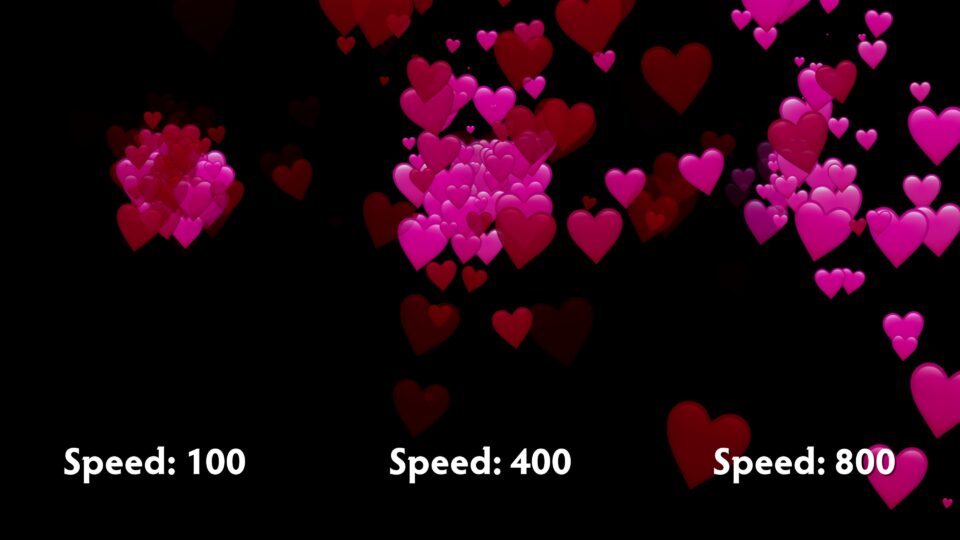
- Speed controls how fast the particles move
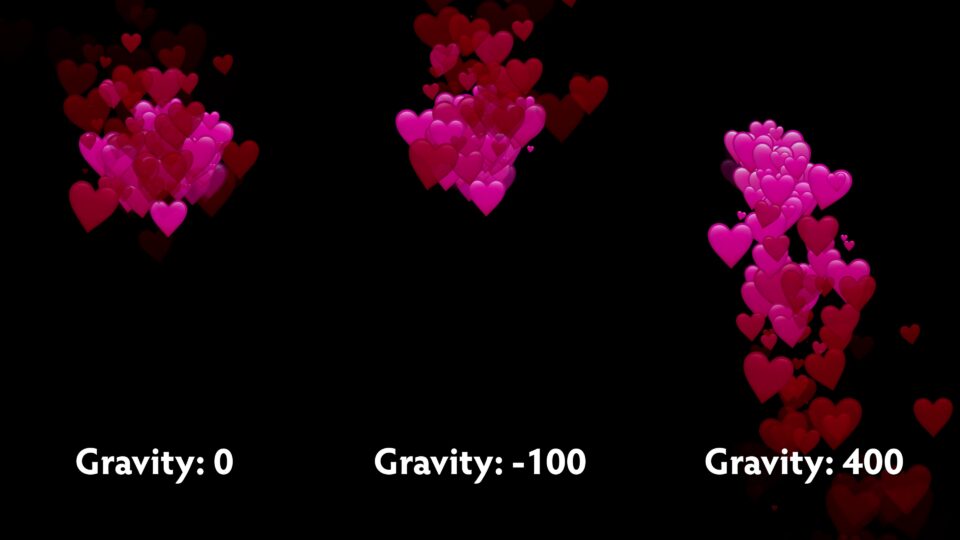
- Gravity controls how much they fall
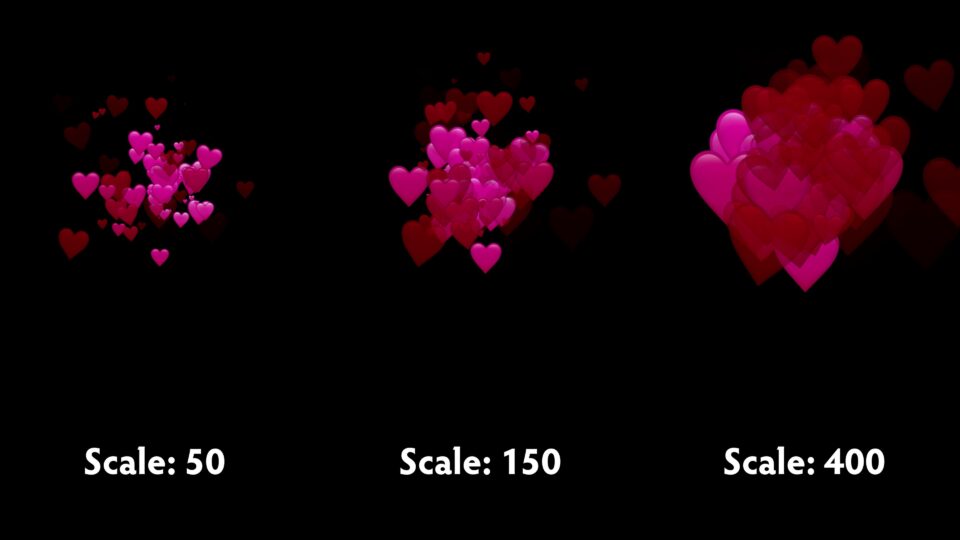
- Scale controls their size
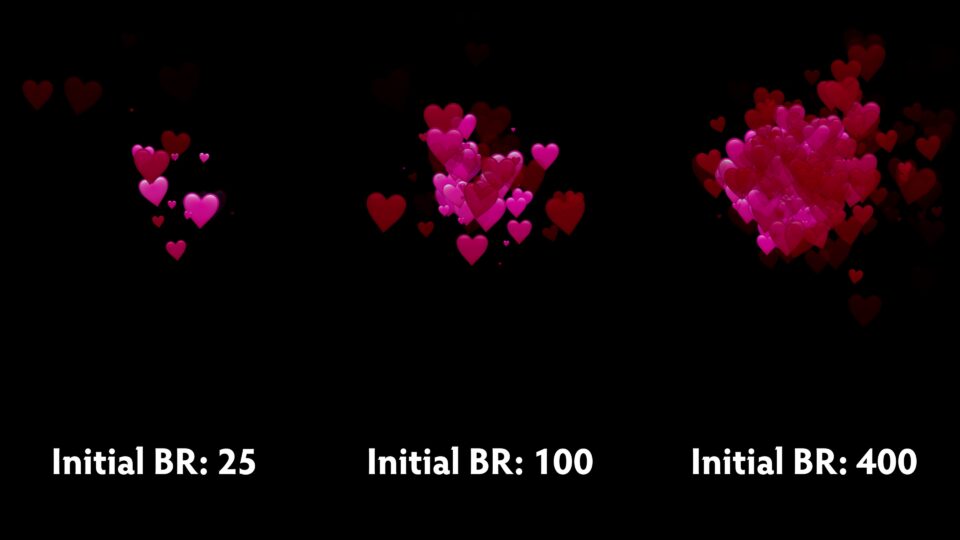
- Initial Birth Rate is how many will be emitted per second from the start
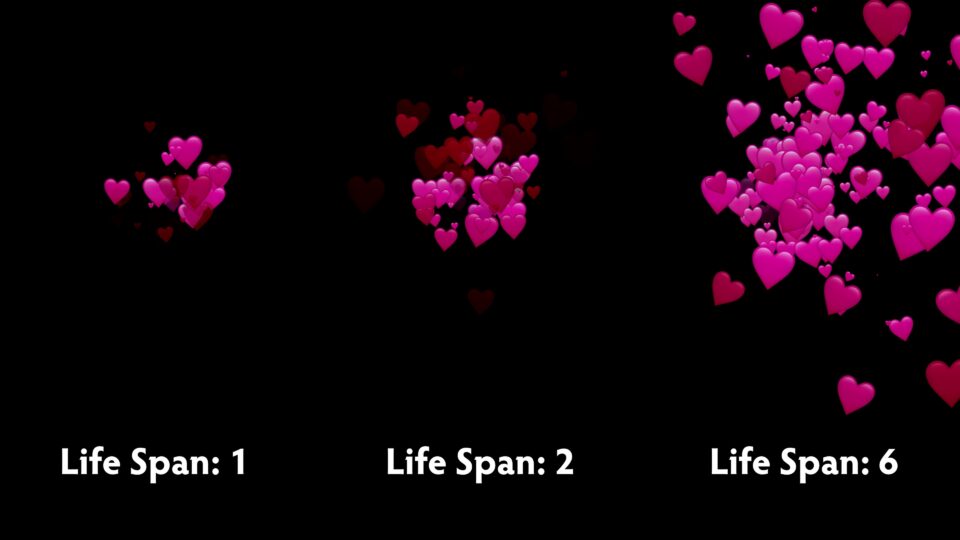
- Life Span is how many seconds they will live.
- Slow Birth Rate is the time when the birth rate starts to slow down
- End Birth Rate is the time when no more particles will be made.
So, if End Birth Rate is set to 6 and Life Span is set to 3, the last particle will disappear at 9 seconds.
Timing is important, and different. Most titles will retime themselves automatically, but since that would make particles hard to predict, all the funwithstuff Emojisplosion titles work on a fixed timing system. If you trim them off, they’ll just end, which is handy if you want them to end at the same time a shot ends.
Each template lasts for ten seconds, but if you want one to last longer, just ⌥ -drag another copy along the timeline and position it just under the end of the prior one.
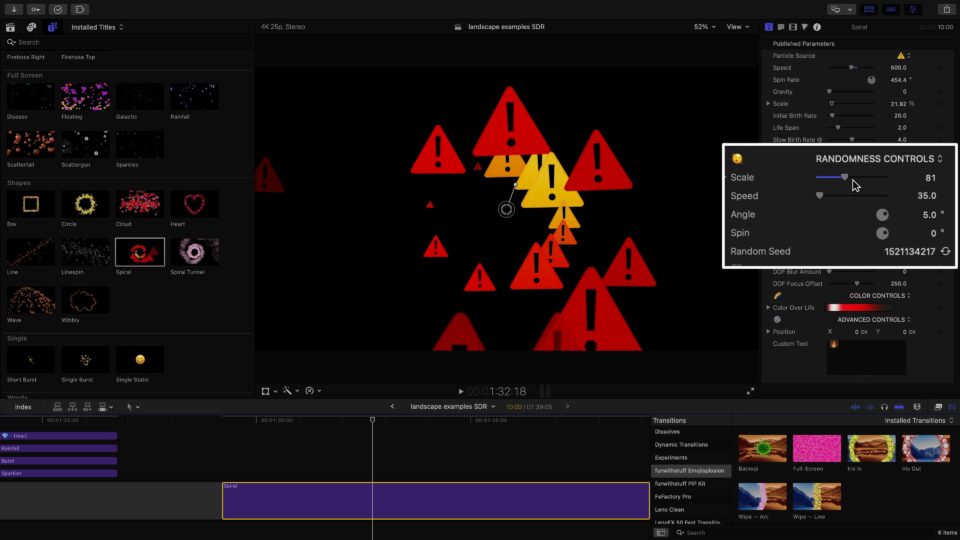
You’ll find other controls for some specific templates, for example with Spiral and Spiral Tunnel, where you can adjust the Spin Rate and the Radius of the circle that the particles are emitted from.
Under the main controls are the Randomness controls, and each of these controls how much different each particle is from one another, in terms of size, angle, if they spin, and so on. If the particles aren’t getting as small as you think they should, turn down the Scale control under Randomness.
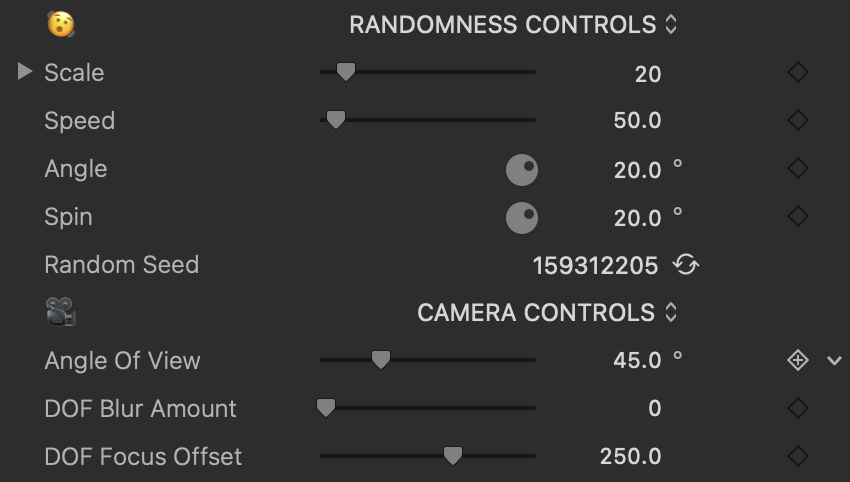
There’s also a Random Seed button, and pressing the little double-arrow icon here picks a new one, giving you a random new looks.
Angle of View, under Camera Controls, can exaggerate or reduce the 3D effect, so choose whatever works for you. Note that the Depth of Field might be a little slow, and might look odd (i.e. blurry in the wrong places) if you turn it on. This is a built-in limitation I unfortunately can’t work around, and though selective blur might still be useful in some cases, it’s off by default in all these templates.
Color over the lifespan of each of the particles can be changed, and this acts as a tint on top of the regular emoji color. The quickest way to change this is to left-click on the lower gradient ramp to set a new color stop, then right-click on the little box to quickly pick a new color.

Down in the Advanced Controls, you’ll see the Custom Text field mentioned earlier, the Rotation controls, and the Position field which is controlled by the on-screen control. If you want to keyframe where the particles are coming from, use the keyframe controls here to make that happen.
For example, the Sparkler template is very good at looking like a magic wand, or a stream of tears, or anything similar that’s emitted from a source. It’s best to track these manually. Place the Sparkler above a clip, then use the on-screen control to position it where you want it. Click the diamond to the right of the Position field to create your first keyframe.
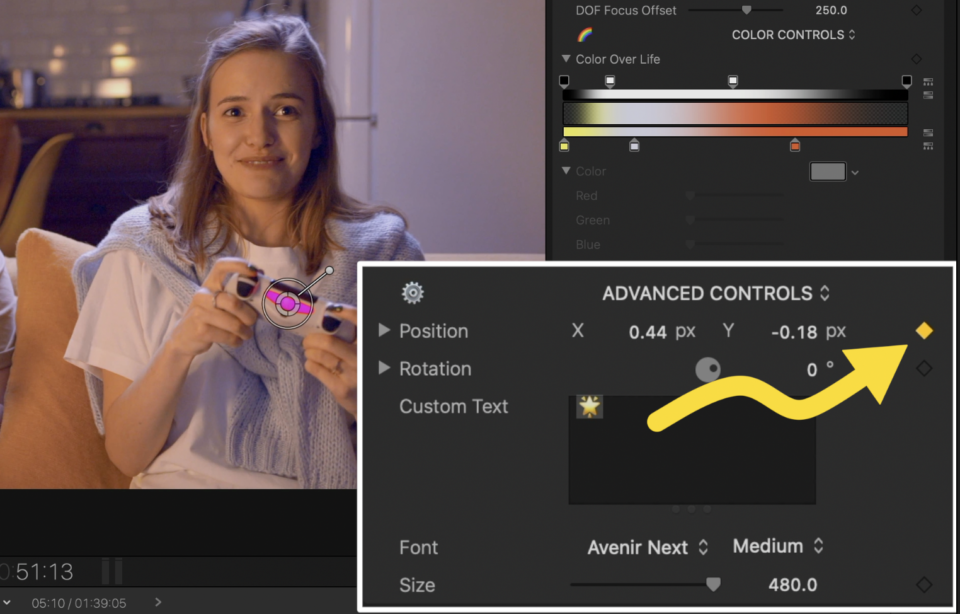
Now, move forward in time by pressing → once or twice to move one or two frames, or even ⇧→ to move ten frames. Now just move the on-screen control to the new position. Repeat these two steps until the end of the shot — it won’t take long.
The Object Tracker works well with the Single Static title, which you can use to cover someone’s face. Drag Single Static directly to someone’s face in the Viewer, make sure it’s selected the person’s face, then press Analyze. When that’s done, use the Transform controls to move the emoji back into position, before pressing Done. Size and angle changes you make with the on-screen controls will stay consistent through the tracked area, but only change the position if you want to keyframe it manually.
The Words templates allow you to change the word to whatever you like, but it’s really important to change one of the birth rate, settings, or life span, or press the Random Seed button after changing the word, to force Final Cut Pro to recalculate the particles.
Finally, don’t forget to check out the transitions. They all work in landscape and portrait timelines, and just like the titles, you can change the type of emoji and many other properties. The angle of the Wipe — Line and Wipe — Arc can be changed completely, so you can use them in any direction.
If you have any questions, comments or suggestions for more templates, please let me know — my contact details are to the left.
A final note to avoid confusion
This Final Cut Pro plug-in named “funwithstuff Emojisplosion” is a completely separate product from the free, open source web developer tool called Emojisplosion. The two different “Emojisplosion” products are entirely separate entities for different audiences, created entirely independently of one another, and no confusion is intended.
I have no connection to the creators of the Emojisplosion web library, but it looks great! If you’d like to incorporate emoji into your website, I do recommend you check it out.